All articles
How to Remove Lice Eggs From Hair and Get Rid of Stubborn Nits
Learn how to remove lice eggs from hair effectively. Discover proven ways to get rid of stubborn nits, prevent reinfestation, and keep hair lice-free.
You may remove crawling lice but still find particles attached to the hair that do not disappear with washing. These may be eggs or empty shells called nits. If viable eggs remain near the scalp, newly hatched lice can continue the infestation.
Learning how to remove lice eggs from hair requires careful inspection, a nit comb, small sections, and follow-up. For difficult hair, Zero Lice UAE offers at-home removal in Dubai, Sharjah, Ajman, and other areas of the UAE.
What Are Lice Eggs and Why Do They Stick to Hair?
Female lice attach tiny oval eggs to hair with a glue-like substance. Viable eggs normally hatch in six to nine days, while empty shells may remain until removed or the hair grows out.
Nits do not disappear with shampoo or fall like dandruff. Attached particles do not always mean active infestation; some are old or empty. A crawling louse remains the clearest confirmation.
How Can You Tell Lice Eggs From Dandruff?
Lice eggs are oval and firmly attached near the roots, behind the ears, and around the nape. Dandruff consists of irregular flakes that move easily.
Product residue, dead skin, and hair casts can resemble nits, so colour is not enough. Use bright light and a detection comb to look for live lice before treatment.
How to Remove Lice Eggs From Hair Step by Step
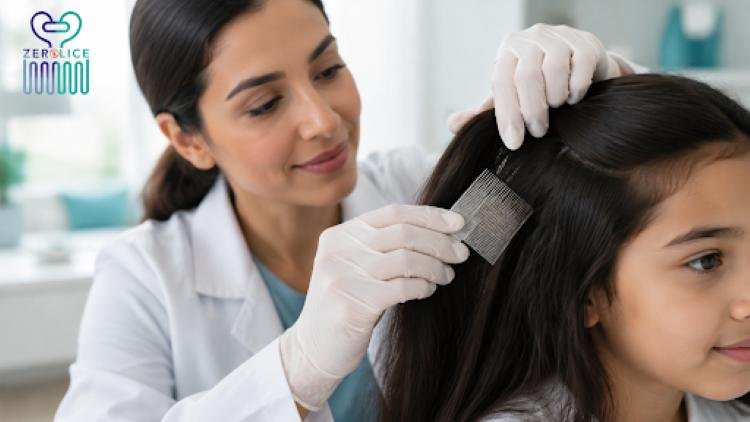
Wet combing can remove lice and nits when performed carefully across the entire head. Follow these practical steps:
1. Prepare the Correct Tools
Use a fine-toothed nit comb, hair clips, white tissues, and bright lighting. Place a towel around the shoulders and clean the comb between sections.
2. Wash and Condition the Hair
Wash with ordinary shampoo and apply conditioner to reduce tangles. If using a medicated product, follow its instructions; some treatments should not be used after conditioner.
3. Divide the Hair Into Small Sections
Begin behind the ears and at the nape. Clip away uninspected hair and work on one thin section at a time.
4. Comb From the Roots to the Ends
Place the comb close to the scalp and draw it slowly to the ends. Wipe it on a white tissue after every pass and repeat from different angles.
5. Remove Firmly Attached Nits Carefully
If eggs remain fixed, slide them down the hair using the nit comb or your fingertips without pulling harshly. Do not use sharp tools or scrape the scalp, particularly when treating a child.
6. Clean the Comb and Repeat Inspections
Clean the comb throughout and recheck the hair. Repeat wet combing on days 1, 5, 9, and 13, with a final check on day 17, or follow the treatment instructions.
If completing every section is difficult, learn about the Zero Lice head lice removal process or book a professional at-home inspection.
Common Mistakes When Removing Nits
Using a wide-toothed comb, working only across the surface, or rushing through thick sections can leave eggs behind. Another mistake is stopping after one session because no live lice are immediately visible. Eggs missed near the roots may hatch later, so follow-up remains important.
Do not pull the hair aggressively or use sharp objects to scrape away nits. Avoid treating every white particle as an egg, because dandruff and product residue may look similar. A careful inspection before removal protects the scalp and prevents unnecessary treatment.
Why Do Lice Eggs Remain After Treatment?
Some treatments kill lice but not every egg, making retreatment necessary. Failure can also follow incomplete coverage, early stopping, or reinfestation from an unchecked contact.
Avoid relying on ordinary shampoo, mixing substances, or repeating medication too soon. Read why DIY lice treatments fail. Ask a clinician before treating babies, pregnant women, or sensitive skin.
How Can You Prevent Lice From Returning?
Check close contacts and treat confirmed infestations. Avoid sharing combs, brushes, hats, towels, and hair accessories, and minimise head-to-head contact.
Do not spray the home with pesticides. Clean recently used hair items and continue checking because missed lice or reinfestation can begin a new cycle.
Why Choose Professional Nit Removal?
Removing nits from dense hair takes time, and sections may be missed. A specialist can inspect systematically, work close to the roots, and explain follow-up without unnecessary products.
Zero Lice provides discreet at-home checks, specialised removal, and follow-up for UAE families. Explore professional lice treatment devices, then review the available lice removal prices and packages before booking.
Frequently Asked Questions about Remove Lice Eggs From Hair
How Do I Get Rid of Nits Stuck in Hair?
Wet and condition the hair, divide it into small sections, and pass a fine-toothed nit comb from roots to ends. Wipe the comb after every pass and gently slide attached eggs along the hair. Repeat inspections on the recommended days to detect newly hatched lice.
How Long Do Lice Eggs Stay in Hair?
Viable eggs near the scalp usually hatch within six to nine days. Empty shells or dead eggs can remain attached for weeks, or until they are removed or the hair grows out. Therefore, old nits do not automatically mean that an infestation is still active.
How Do I Know if Lice Eggs Are Dead?
It is difficult to confirm viability by appearance alone. Eggs found more than about six millimetres from the scalp are usually dead or already hatched, particularly when no crawling lice are present. Empty shells may appear pale, but colour alone is unreliable. Use a detection comb or request a professional inspection if you are unsure.